I
mentioned, at some point, that I am living in Hawaii, taking care of a gorgeous
piece of property while the owners finish out their careers and wrap up loose
ends. While the land has many edibles already (macadamia nuts, passion fruit,
papayas, and guavas) what it was really missing was a more savory element. I
mentioned to a friend that what I really wanted was to plant some vegetables
and herbs but I wasn't sure how to go about doing it while keeping out a very
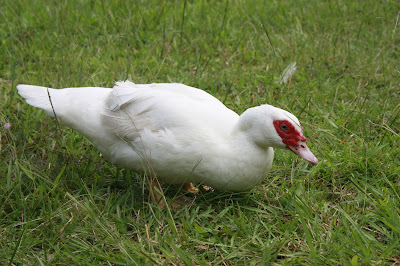
adorable duck and four mischievous feral chickens.
 |
| Delicious home-grown guava! |
Apparently
making a planter is a lot easier than I thought. At first I was tempted to buy
one premade with a minor amount of assembly required. However, it would end up
being quite a bit smaller and, perhaps more importantly, I couldn't brag to
everyone I meet that I actually made one myself.
After
a trip to Home Depot, $43, and borrowing one power tool, we were set.
List
of Materials:
6
5/8 in. x 5 1/2 in. x 6 ft cedar boards (Make sure they don't have any splits
in them. Also, cut TWO of those boards in half. ($19)
1
7 or 8 ft post-like piece of wood, cut into 4 even chunks ($3)
1
inch small screws ($3)
1
1/2 inch small screws ($3)
2
long-ass PVC Pipes ($2.50 each)
Bird
netting ($10)
Twine,
zip-ties, string, paper clips
Dirt/soil/cinder
(Free. . .? I hope?)
Ok,
so this is how easy this is: (My instructions are written like I am a third
grader. Pretend I am a third grader.)
1.
Line up 2 6ft planks parallel to each other. Put a post at the end and line it
up so it looks straight/classy.
2.
Screw 2 small screws though each board into the post-like piece. Repeat on
opposite side of the boards with another post thing.
YOU
HAVE COMPLETED ONE SIDE OF YOUR PLANTER. SHIT YEAH, DAWG. HAVE A BEER AND
CELEBRATE.
 |
| You were supposed to take that beer step seriously. |
3.
As you're drinking your beer, do the exact same thing again as above so you
have another side of your planter.
4.
Take two half-planks of wood and line them up on either end of your planter so
it looks like you're making a rectangle.(Hint: You are.)
The
end of the half-planks should line up with the post-like things (and the end of
the longer cedar planks).
5.
Use the same small screws, 2 screws per board per side, to create the third
wall of the planter.
6.
Do the same thing on the other side.
OH
MY GOD YOU HAVE MADE A THING, AND IT IS GLORIOUS.
So
then you have the option to get real fancy and put PVC pipe on the side so you
can hang bird netting over your garden.
Is that a thing you want to do? If yes. . .
7.
You need to get a drill bit a tiny smidge larger than the circumference of your
longer screws. You have to drill the holes in the PVC pipe first otherwise
apparently things are crazy and the plastic explodes and people die. Sad.
Anyway,
make 3 holes at each end of the pipe, about 2.5 inches apart. Do so for both
pipes.
8.
Take a long screw and screw the PVC pipe to the side of the exposed post-thing.
If you're doing it right the bottom of the PVC pipe will touch the top of the
long side of the cedar planks. If that doesn't make any sense, just look at the
final product below and it should be clear. Use remaining other 2 screws in the
pre-drilled holes.
9.
Bend the PVC pipe toward the outward-facing side of the post-thing. Repeat Step
8. It should kind of look like the frame of a covered wagon. You can put on
your best gingham dress and braid your hair.
Before
you do that, though, make sure you do the exact same thing with the PVC pipe
and the screws to the other side of the planter. Then it will REALLY look like
the frame of a covered wagon.
 |
| This duck REALLY wants to be in your planter. |
10.
Drape some bird netting over the side of your covered wagon and tie it off with
string or something. Really, whatever works for you aesthetically? Just as long
as it's relatively difficult for a bird-creature to roll around in your planter
and fuck up your Christmas.
That's
it! You have your planter. WE MADE THINGS. TOGETHER!
Oh,
or you could figure out what to do by watching a video or something.
My
planter is 11 inches high, giving plenty of room for root vegetables if I
decide that's what I want to do later.
Plant
List!
Pineapple
Sage
Parsley
Sweet
Basil
Trailing
Rosemary
Dill
Ghost
Peppers (x2)
Artichoke
Asparagus
Zucchini
(Ok, so they're going to be a bit too big for the planter. Instead, I made 3
dirt mounds, put in the seeds, and I'm hoping for something glorious. I already
have one sprouting!)
Spinach
(From seeds)
Arugula
(From seeds)
String
Beans (From seeds)
Also
part of the clan, but so far un-planted are:
Thornless
Blackberry
Strawberries
Lavender
Coffee
Plants (This is Hawaii. Of COURSE it grows well here.)
I'll
(hopefully!) do an update again sometime soon to see how this works out!

I'm not sure I'd call it "gorgeous" >.> . Nice job though, Yarcakes!
ReplyDeleteIt's gorgeous. Don't hate! It was made with enthusiasm and love. And lumber.
DeleteNice job! Looks great! :D
ReplyDeleteThanks! I can't believe how easy it was to make. Seriously. less than 45 minutes!
Delete