Showing posts with label food. Show all posts

Sunday, May 11, 2014

Mom's Grilled Cheese: A Mother's Day Recipe

Since it's Mother's Day and I'm thinking fondly of my mother, I thought it might be a good time to share the recipe for the best thing I know how to make, courtesy of, you guessed it, my mom.

I've been making this since I was 7 or 8.  I was an extremely picky eater and I think that sometimes it was easier for my parents to just give in to my stubbornness than slowly watch me starve myself if I didn't get my way. You can say it, it's OK. I was a brat.

My mom traditionally has made her grilled cheese with Mayo, an ingredient that I will hate forever, no matter how it is disguised. (Aioli, huh?) However, due to my constant pestering and refusal to eat the sandwich her way, she would give in and make it with butter instead.

The result? Perfection. Since that day, I have yet to eat a grilled cheese sandwich that I like more than her  butter method. It's simple, but it's perfect.

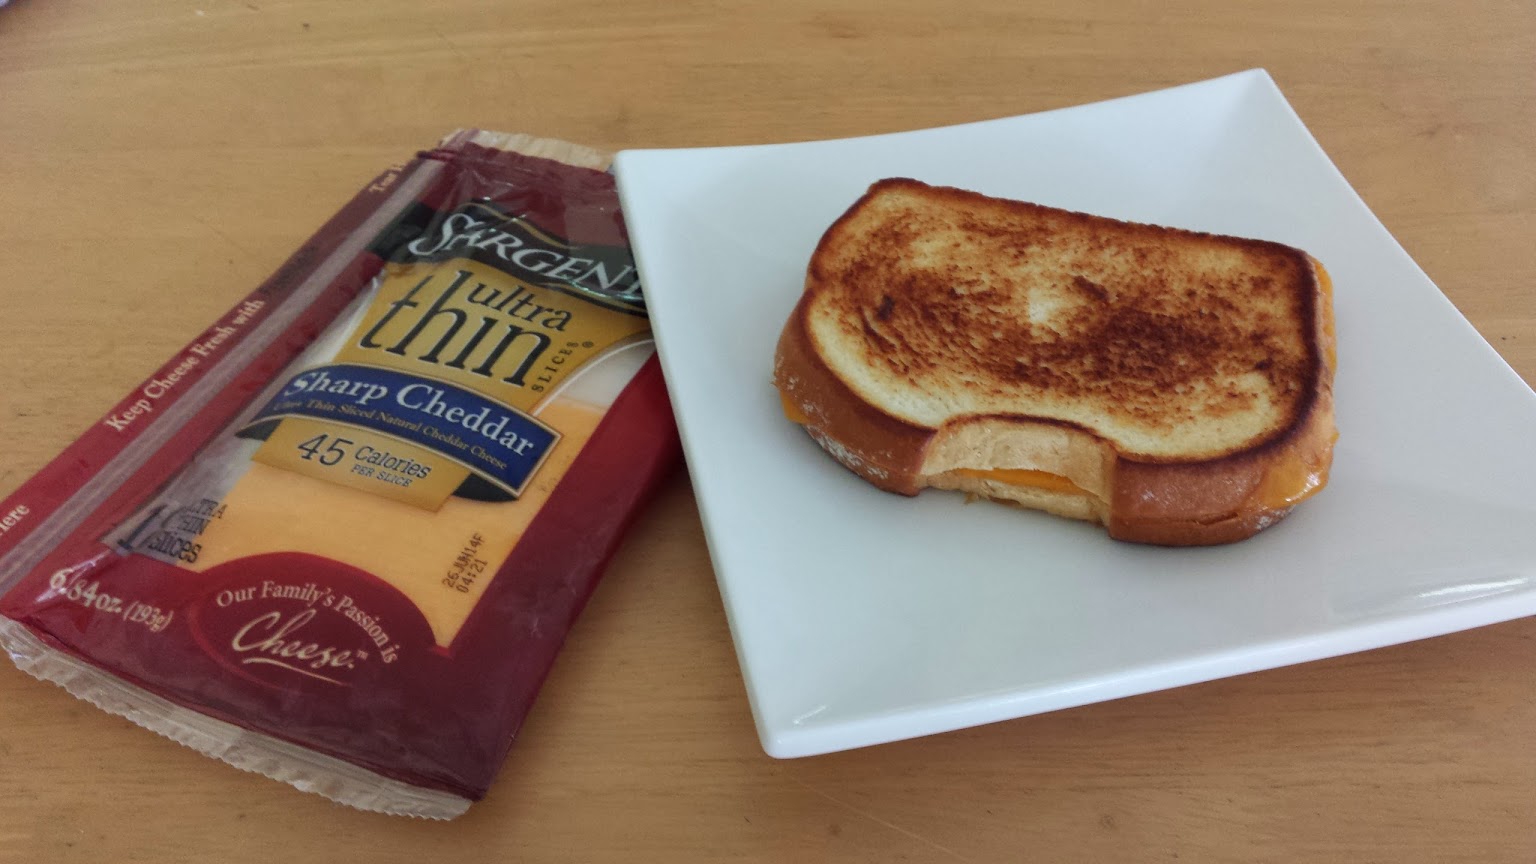
I recently got a free voucher for Sargento's Ultra Thin cheese through the Influenster program. Kristen and I have both been participants for about 4 years (maybe more in her case) and it's a pretty cool way to test out new products. This go around, Sargento sent me an adorable lunch bag and the voucher for free cheese. Pretty much as soon as they asked me to test out the cheese, I knew what I was going to make to test it out:

Mom's Grilled Cheese. 

Maybe I shouldn't be this passionate about melted cheese on bread but whatever. I do what I want. 


You'd think something so simple wouldn't need a recipe but you'd be surprised at how many people mess up this classic. So, here you go:

1. Turn on the over to low heat. Wait patiently until the pan is hot enough to make butter melt, but not brown. 
2. Please the cheese on one piece of bread and, before you stick on the top, butter the top of the bread. This is where things can get dicy. Too much butter and you're looking at a greesy, soggy sandwich. Too little, and you don't get that delicious, even brown color.

For my sandwich this go around, I used 3 slices of the ultra thin sharp cheddar. 

3. Put the sandwich in the pan, butter side down. If you hear a loud sizzle, it's too hot. Don't do that to yourself. That's just asking for a burnt, half-melted sandwich that isn't any good. 
4. While side one is cooking, butter the top of the sandwich. By the time you are done, you should flip. Allow the other side a similar amount of cooking time. 
Even, delicious browness. 

5. The end step is simple: Continue flipping the sandwich until you achieve optimal golden brown on both sides. If you notice that you've got white bits, it means you were slacking on your butter step. 
Do you see the poorly applied butter evidence?! I'm a disgrace.

6. Enjoy with a Lilikoi Lemon Drop. (Because they're delicious and also because life is short.) 
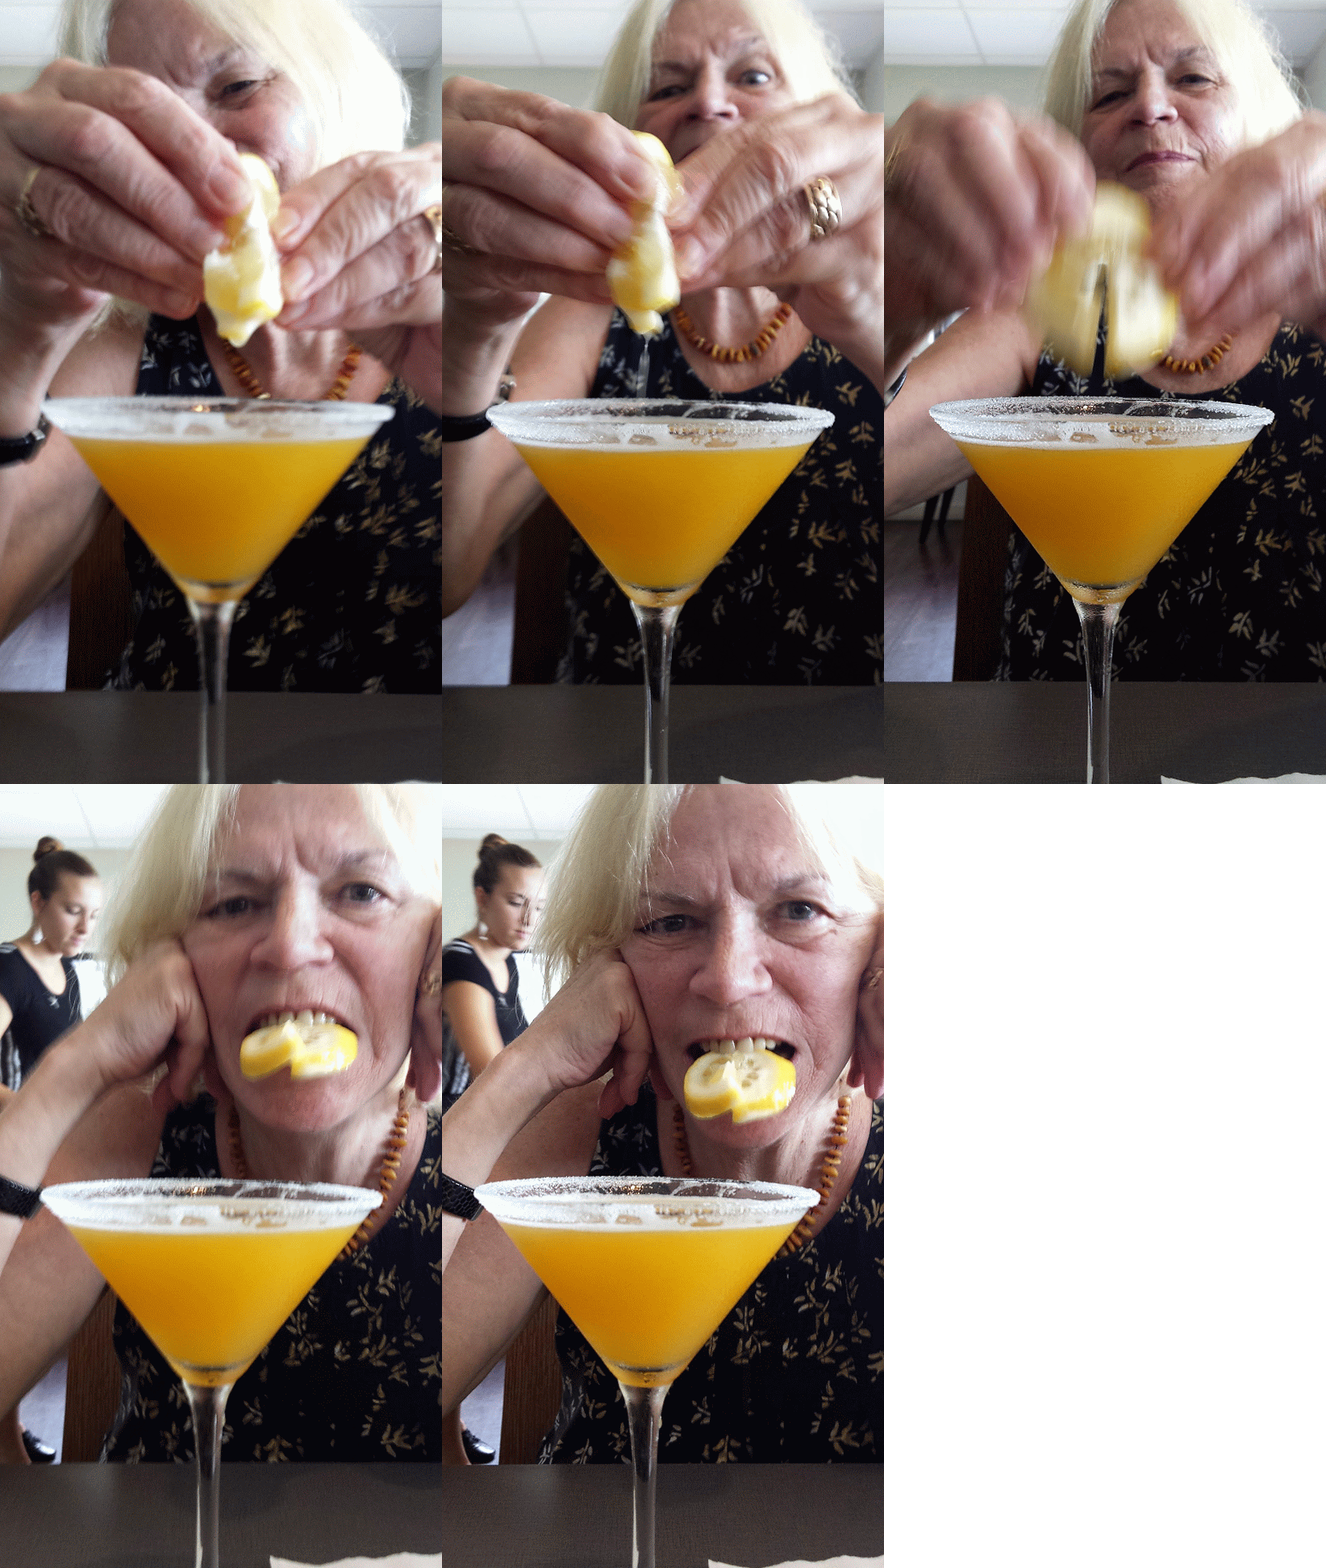
Ok, so maybe I didn't actually have this drink with my grilled cheese.
I just wanted to show off my mom's lemon squeezing abilities. 

So there you have it. Grilled cheese, my favorite beloved sandwich from my favorite beloved mother.
Hooray!

Thar' she blows!

Oh, and for those that think grilled cheese is the ultimate high-calorie food, it isn't! In total, it's less than 400 calories (using 4 of the Sargento thin slices like I did), including all that luscious butter.

Happy Mother's Day to my own mom and all the other mom's out there!

Monday, May 20, 2013

Let Us Ford Rivers, Wear Gingham, and Build Planters


I mentioned, at some point, that I am living in Hawaii, taking care of a gorgeous piece of property while the owners finish out their careers and wrap up loose ends. While the land has many edibles already (macadamia nuts, passion fruit, papayas, and guavas) what it was really missing was a more savory element. I mentioned to a friend that what I really wanted was to plant some vegetables and herbs but I wasn't sure how to go about doing it while keeping out a very adorable duck and four mischievous feral chickens. 
Delicious home-grown guava!

Apparently making a planter is a lot easier than I thought. At first I was tempted to buy one premade with a minor amount of assembly required. However, it would end up being quite a bit smaller and, perhaps more importantly, I couldn't brag to everyone I meet that I actually made one myself.

After a trip to Home Depot, $43, and borrowing one power tool, we were set.

List of Materials:
6 5/8 in. x 5 1/2 in. x 6 ft cedar boards (Make sure they don't have any splits in them. Also, cut TWO of those boards in half. ($19)
1 7 or 8 ft post-like piece of wood, cut into 4 even chunks ($3)
1 inch small screws ($3)
1 1/2 inch small screws ($3)
2 long-ass PVC Pipes ($2.50 each)
Bird netting ($10)
Twine, zip-ties, string, paper clips
Dirt/soil/cinder (Free. . .? I hope?)

Ok, so this is how easy this is: (My instructions are written like I am a third grader. Pretend I am a third grader.)

1. Line up 2 6ft planks parallel to each other. Put a post at the end and line it up so it looks straight/classy.

2. Screw 2 small screws though each board into the post-like piece. Repeat on opposite side of the boards with another post thing.

YOU HAVE COMPLETED ONE SIDE OF YOUR PLANTER. SHIT YEAH, DAWG. HAVE A BEER AND CELEBRATE.
You were supposed to take that beer step seriously. 

3. As you're drinking your beer, do the exact same thing again as above so you have another side of your planter.

4. Take two half-planks of wood and line them up on either end of your planter so it looks like you're making a rectangle.(Hint: You are.)
The end of the half-planks should line up with the post-like things (and the end of the longer cedar planks).

5. Use the same small screws, 2 screws per board per side, to create the third wall of the planter.

6. Do the same thing on the other side.

OH MY GOD YOU HAVE MADE A THING, AND IT IS GLORIOUS.


So then you have the option to get real fancy and put PVC pipe on the side so you can hang bird netting over your garden.  Is that a thing you want to do? If yes. . .

7. You need to get a drill bit a tiny smidge larger than the circumference of your longer screws. You have to drill the holes in the PVC pipe first otherwise apparently things are crazy and the plastic explodes and people die. Sad.
Anyway, make 3 holes at each end of the pipe, about 2.5 inches apart. Do so for both pipes.

8. Take a long screw and screw the PVC pipe to the side of the exposed post-thing. If you're doing it right the bottom of the PVC pipe will touch the top of the long side of the cedar planks. If that doesn't make any sense, just look at the final product below and it should be clear. Use remaining other 2 screws in the pre-drilled holes.

9. Bend the PVC pipe toward the outward-facing side of the post-thing. Repeat Step 8. It should kind of look like the frame of a covered wagon. You can put on your best gingham dress and braid your hair.

Before you do that, though, make sure you do the exact same thing with the PVC pipe and the screws to the other side of the planter. Then it will REALLY look like the frame of a covered wagon.

This duck REALLY wants to be in your planter.
10. Drape some bird netting over the side of your covered wagon and tie it off with string or something. Really, whatever works for you aesthetically? Just as long as it's relatively difficult for a bird-creature to roll around in your planter and fuck up your Christmas. 

That's it! You have your planter. WE MADE THINGS. TOGETHER!

Oh, or you could figure out what to do by watching a video or something

My planter is 11 inches high, giving plenty of room for root vegetables if I decide that's what I want to do later.

 Plant List!

Pineapple Sage
Parsley
Sweet Basil
Trailing Rosemary
Dill
Ghost Peppers (x2)
Artichoke
Asparagus
Zucchini (Ok, so they're going to be a bit too big for the planter. Instead, I made 3 dirt mounds, put in the seeds, and I'm hoping for something glorious. I already have one sprouting!)
Spinach (From seeds)
Arugula (From seeds)
String Beans (From seeds)

Also part of the clan, but so far un-planted are:
Thornless Blackberry
Strawberries
Lavender
Coffee Plants (This is Hawaii. Of COURSE it grows well here.)

I'll (hopefully!) do an update again sometime soon to see how this works out!


Thursday, November 1, 2012

Fish: it's what's for dinner.

I like fish. Hell, I am choosing to dedicate my life to the study or marine organisms, so I better like fish.

I also like to eat fish. Lots of people do and it happens to be the major protein source for much of the world.

Then there are those people who are all like "Oh, I'm allergic to fish." Way to be a downer. No, it's cool, go ahead and get your protein solely from sources like chickens and cows. Let's devote billions of acres of land to raising cows and chickens for you to eat. It's not like cows are just methane producing, grass eating, anthrax pooping machines....oh wait.

According to the US Environmental Protection Agency, ruminant livestock (ie. cows and sheep) produce 28% of global methane emissions each year.
And you thought Mom's chili was a major source of methane production..
And don't get me started on chickens....

Anyway, my point is that if you're not interested in being a vegetarian, fish is a good option for protein. And if I hear you say you're allergic to fish, I'm going to punch you in the face.

I might not NEED to punch you in the face, but I really want to.
You might think that's rude because you can't control what you're allergic to. Chances are though, you base your statement on the fact that you had an allergic reaction when you ate fish once, after years of being able to eat fish without a problem.

Guess what? You're probably not allergic.

Say hello to Scombrotoxin. This toxin is made by bacteria that grow on the fish once it's caught and isn't chilled or processed right away. The toxin is actually just an elevated level of histamine, which can cause food poisoning that looks like an allergic reaction. This is especially a concern for fish belonging to the family Scombridae, hence the name of the toxin. These fish include tuna and mackerel. It can also affect the meat of a few other species including bluefish, mahi-mahi and dolphins. For more info on this, you can check out the FDA's webpage.

Go ahead....eat me. We'll see who's sorry when you go into anaphylactic shock.
Now, some people might legitimately be allergic to fish or shellfish or some other marine organism that sends their bodies into attack mode, but you can find out via an allergy test, right? Just stop saying you're allergic unless you can actually prove it.

It's like saying you're the fastest person alive. You can say it all you want, but you're just an asshole until you have a gold medal in the 100 meter dash.


Thursday, July 12, 2012

Some thoughts on local food.

Hello, stock imagine of vegetables that has already
been used in a blog post this year..
It was one of my New Years resolutions, to start eating more organic/local food. Now, I am aware that organic and local mean two very different things....but frankly, local > organic > non-organic.

Local food means less energy put into getting my food to me in terms of gas/diesel, energy associated with running a grocery store for me to shop at, etc. It also means I get food that has been picked/harvested/collected a lot more recently than the stuff that's getting picked green and shipped here from other countries. The fresher the food, the more nutrients it retains.

I remember during my freshman year of college, there were little table toppers with info about the new program where the school was growing fresh produce to use in the dining hall. It had the staggering statistic that about 50% of the nutrients in fresh produce was lost within 7 days of being picked.

Think about that. 7 days. It can take days for food to get from a farm to a grocery store, especially if it's being brought across the country or from overseas. Thus, it's likely that a lot of the produce we get in the grocery store is not as nutrient rich as if we grew it in our back yard, picked it and ate it that same day.

Now, you might question that statistic, but after a thorough internet search, I found a scientific paper that supports this statistic. I might be overly zealous in the use of scientific paper search engines, but when google or bing yield nothing, it's time for drastic measures. Anyway, the paper I found studied the loss of nutrients in spinach. It found that, even when refrigerated, spinach lost 53% of its folate over the course of 8 days. At higher temperatures it hits that rate of loss a lot faster. Carotenoids were found to be lost a a similar rate, also dependent on temperature, with only 54% of initial levels remaining after 8 days.

So I may have just used to much science-y talk there, but the basic idea was that, even while refrigerated, spinach loses about 50% of some of its nutrients after 8 days. Just because this is true for some nutrients, doesn't mean it's true for all of them. In theory though, it makes sense. Heat and light destroy nutrients...when a plant is growing it is making more. As soon as you pick the plant though...all it has is what was there when it was picked....which steadily decreases as time marches on.

Ok, so fresher is better. Can we all agree on that point? In that sense, shopping local is better. At Farmer's Markets, food tends to be picked the day of, maybe the day before so it really is fresher than what you'd find at a grocery store.

"My life long goal is to be checker at Wal-mart and take constant abuse
 from customers who are pissed that the shitty plastic crap they are buying
 isn't ringing up as cheap as the sticker on the shelf said."
Local also means supporting the farmers around me. I'm not supporting Wal-mart and the truck driver who drove the food here and the laborers who picked the food. I am just supporting the farm that grew the food. Often, that means that stuff that is in season is cheaper than at the grocery store AND the farmer gets more money for what they are producing. That's pretty awesome, if you ask me. I might be supporting fewer jobs on a superficial level, you know, a farmer and the laborers he hires vs. all the employees at Wal-mart and everyone who worked to get the food there and the farmers who grew it, but the local farmer is getting paid a better wage. Besides, with a return to a smaller farming system and more local food consumption, we'd need more farmers and laborers. Those Walmart checkers can pick produce instead of bagging groceries! I mean, who really wants to work at Wal-mart anyway?

The problem I have begun to notice though, is that a lot of produce stands simply advertise that they are selling fresh fruit. Upon closer inspection, said fruit has a produce sticker on it. What. The. Fuck? If I wanted imported cantaloupe, I would drive my ass to Walmart. I don't want to stop by a roadside produce stand and PAY MORE for the same shit they sell at a big box store. Yes, I am supporting locals who are selling food from far away, but it feels like they are lying to me. If you are a produce stand, I expect you to sell food that you grow yourself. This is apparently not how it's done and that upsets me. Apparently, you have to look for the 'local' tag, to find local produce, even at a roadside stand. What is wrong with people?

I only want to eat food that comes from 10,000 miles away.
Moving on.

There are some though, that think the local food movement is actually a bad thing. When I talk about eating local food, I mean food that is in season and is available locally. I don't mean going to extreme measures to grow food in my area that normally can't be grown here. When I talk about eating local food, I don't mean eating ONLY local food, to the point where I spend all my time trying to figure out how to make a meal out of locally farmed dirt, the only thing in season during the winter months. I also don't mean eating ONLY local food to the point where I spend all my time and energy hunting for food that I can eat. I mean being conscious about what I am buying and where it is coming from and making a few changes.

When you stop being a soulless Walmart employee and
start farming, you can join THIS site!
My point here is that local farms are more transparent with their growing practices. When you know your farmer, you can ask them how they grow things. Just because a local farm isn't organic, doesn't mean their produce isn't better than Safeway's line of organic foods, because it probably is. Getting certified to be organic is expensive so many smaller, local farms might not pay the extra cash to get that certification. Keep in mind though, that also goes the other way. Just because a farmer is local, doesn't mean they don't use nasty pesticides. Ultimately, you need to be smart about what you buy and who you buy from.


Tuesday, June 12, 2012

Spam Musubi

Pan fried in gluten free terriyaki sauce of deliciousness.
 So, I might have a problem. I think SPAM is awesome. Granted, I've only ever had it one way, but it's basically the greatest thing ever. Spam musubi. Oh yeah. Terriyaki SPAM with white rice, all wrapped up in a nice nori package. Daaaaaaamn.

 When I went to Hawai'i in January with Ariana, I wouldn't shut up about how excited I was to eat some SPAM musubi. I was able to get my craving satisfied by a vendor at the Hilo Farmer's Market. It was delicious.

Everything is ready...bring on the questionable meat!
Fast forward to this past weekend. My little sister graduated from high school and we had luau to celebrate. Aside from mangoes and pineapples galore, I made sure to make some SPAM musubi. It was my first attempt at making it myself, but as it quickly disappeared, I figured I did something right. This was re-enforced by my little sister's request for more the next night.


Rollin', rollin', rollin', YEAH.


I won't bore you with the recipe. Google it. There are like 8000 pages all with the same recipe. Basically, you pan fry the SPAM with terriyaki sauce, then roll it up in some nori with white rice. BAM.

NOMS.


It's basically the greatest thing ever. I'm sure it's more sodium than I should eat in a week, but I don't really care. BRING ON THE HEART FAILURE!

Wednesday, May 9, 2012

Recipe: Feta Couscous With Mushrooms And Red Peppers


Oh hey, so I heard this was this thing called summer coming. Apparently in this season, you have to do things like, oh, I don’t know. . .wear a swimsuit. 

In public. In the DAYLIGHT.  

Fuck that shit, man!

Anyway, I decided that since people are going to see a lot more of my exposed flesh than I’m really prepared for, I should probably change up my lifestyle or something. Mainly, I need to stop eating such crap and going out all the time. A girl can only consume so many lamb kebobs cooked in boiled 45-year-old virgin fat.
LOOK! I'm even providing nutrition facts
 for this recipe I made myself.
BOW TO ME. 
Anyway, this is a recipe post, so I’ll get on with the recipe part. Yay!

Feta Couscous With Mushrooms And Red Peppers


Makes 4 servings (or 3 if you’re me, and a glutton.)
·         3 servings israeli couscous (1/3 cup per serving)
·         1 1/2 tsps olive oil
·         1 oz feta (this is the equivalent to ¼ cup)
·         1 tiny piece of butter, like the thickness of a slightly obese quarter
·         1/2 oz dill (or basically as much as you want because it has almost no caloric value)
·         1 cup chopped mushrooms
·         1 cup chopped red pepper

In medium sauce pot, cook the couscous according to the packaging. Add salt and butter to the boiling water.

In a separate pan, heat olive oil in pan. You should use a stainless steel pan so you don’t get cancer later in life. Swirl around mushrooms and peppers until mushrooms brown slightly. Add minced garlic and finely chopped dill near the end of cooking. If you add them too early, you’ll dull the flavor. You want things to have flavor, don’t you!?

Add contents of pan to couscous, along with feta. Stir on medium heat for 1 minute to combine ingredients. Serve and enjoy!


How did I feel about it?
It was pretty good. One serving is enough for a meal, so I was full enough that I didn’t start eyeing my neighbors. I’d make it again, for myself and maybe for Kristen. It’s not on the “I’ll make this meal for my hot date” list yet.

Next time I experiment with couscous, I’ll probably make it with curry, almonds and chicken. Oh, and I'll include a picture of the actual dish. Hopefully that picture won't be from my phone which makes even delicious things look practically inedible! 

Tuesday, April 24, 2012

Cinnamon Pumpkin Muffins


Pretty please with brown sugar and cinnamon on top?
Cinnamon Pumpkin Muffins
(makes 12)

INGREDIENTS:
1 cup all-purpose flour
½ cup flax seed
1 tsp baking powder
2 tsp cinnamon

1 15-oz can pumpkin pie filling (unsweetened)
2 large eggs
½ cup packed brown sugar
¾ cup granulated sugar
1/2 tsp baking soda
1/2 tsp salt

½ tsp cinnamon
1 tbsp brown sugar

DIRECTIONS:
Preheat the oven to 350F and grease muffin pan.

Stir together flour, flax seed, cinnamon and baking powder in a small bowl.

Mix together pumpkin, eggs, sugar, baking soda, and salt in a large bowl until smooth, then mix in flour mixture until just combined. Pour batter into greased muffin pan, filling each well about ¾ full.

Mix cinnamon and brown sugar together in the now empty flour bowl. Spinkle tops with cinnamon-sugar mixture.

Nom!
Bake until puffed and golden brown, about 20 to 25 minutes.

Let cool and then eat!

Sunday, April 1, 2012

Edible Plants: A Guide to Surviving the Zombie Apocalypse

I spent the weekend at the US Fish and Wildlife National Conservation Training Center in West Virginia. All West Virginia jokes aside, it was a good weekend, filled with networking and outdoor activities. We spent one afternoon getting a taste of various career paths within the Fish and Wildlife department. This meant going outside and getting to play!


One of the sessions that I did was a wild flower identification class. I really enjoyed it, even though I am not a plant person. Let me share with you why I don't consider myself a plant person. I kill plants. I have a black thumb. I had a cactus as a child that I killed, not because I over watered it, like every other person who kills cacti. No, I under watered the damn thing. I basically forgot that it was alive. That's why I'm bad with plants.

You think you'll survive off the wildlife?
Zombie squirrel says "think again".

Regardless, I think knowing about plants is really cool. Yeah, that makes me a nerd, but so what? When the zombie apocalypse comes and I survive on edible plants, who’ll be laughing then?

During the class I took a few pictures and decided I should share with all of you. That way, you too might have a chance at survival after the world ends.


Dutchman's Breeches gets it's name from the fact that
its flowers look like pants hanging on a clothesline. 
This makes me 'squee' at the adorableness.

This is called Dutchman’s Breeches. Like many spring ephemerals(ie. flowers that come up only for a short while in the spring), it was used as a blood thinner. In the early days, people thought that after spending the winter in your cabin, eating whatever potatoes and meat that you stored, your blood was thick and needed to be thinned. Thus, the first spring plants were thought to be blood thinners and were used to help clear out all the ick that accumulated in your body after sitting on your ass all winter. Actually, this flower might be toxic, so don’t actually eat it.


The next flower is an invasive species....boo, hiss. At least it's edible though. Feel free to eat away. The leaves taste mildly like garlic. Thankfully, I didn't taste any mustard or I would have spat it out immediately. Supposedly the leaves are good as greens in a spring salad and are best when young.


The photo here shows a clump of Ramps. Honestly the grammar involving the name of this plant confuses me to no end. Can there be a single Ramp? Is it Ramps or a clump of Ramps? I have no idea.


These are basically wild leeks. If you thought the Mustard Garlic was strong then you might not like these so much. You can eat the leaves, which have a STRONG garlic taste and the root, which is white and looks very similar to a small leek or thin onion bulb, is edible as well. Eat this to keep the vampires or other survivalists away.


Here is the Cut-leafed Toothwort, so named for it's leaves and the shape of it's roots. Apparently, back in the day, common medical thought was that if a plant looked like a part of the human body, that's what it was good for. Thus, toothwort was used for, you guessed it, teeth! This plant is related to horseradish and the root has a peppery flavor when eaten raw. I cannot verify this claim, as I only ate leaves during this particular class.
Finally, we have the Virginia Bluebell. As far as I know, it's not edible, so I'm just including it because it's pretty. I mean, this was a class in wild flower identification, so not everything was about stuff you can put in your mouth. Heh.


Anyway, hope you enjoyed my photos. Maybe next time you get off your fat ass and go outside, you can keep an eye out for some of these plants. Then you can impress your friends when you know the names of these plants. We all know impressing your friends is really the ultimate goal for learning anything.

Wednesday, February 22, 2012

Chocolate Beer Cupcakes with Honey Spice Frosting and Cocoa Nibs

Recipe adapted from Dave Leiberman

This is a chocolate cake recipe that I have used for many years now. The originally recipe calls for sour cream....which I find completely and utterly disgusting. I also forgot that the recipe called for this, as it’s been a couple years since I last made it....so I didn’t have sour cream. Instead, I added an extra egg and was quite pleased with the result. Typically, this cake tends to be overly moist and crumbly. This was not so with my alteration and was a lot easier to work with.

Ingredients

  • ¾  cup unsweetened cocoa, plus more for dusting finished cupcakes
  • 1 ½  cups sugar
  • 2 cups all-purpose flour
  • 1 teaspoon baking soda
  • Pinch fine salt
  • 1 tsp chili powder
  • 2 tsp cinnamon

  • 1 ½ cups of the beer of your choice
  • 1 stick butter, melted
  • 1 tablespoon vanilla extract
  • 4 large eggs

Directions

Preheat oven to 350 degrees F.

In a large mixing bowl, whisk together the cocoa, sugar, flour, baking soda, and salt.

In another medium mixing bowl, combine the stout, melted butter, and vanilla.
Beat in eggs, 1 at time.
Gradually mix the dry ingredients into the wet mixture.

Line a muffin tin with cupcake liners. Place approximately ⅓ cup of batter into each tin. Bake for about 10 minutes and then rotate the pans. Bake another 10 to 11 minutes until risen, nicely domed, and set in the middle but still soft and tender. Cool before turning out.


Frosting
The beer that I chose to use didn’t have as much chocolate flavor as I wanted, but the honey and spice notes were there. I decided that I wanted to emphasis that with my frosting, so I chose to make a honey spice frosting.
1 stick softened butter
2 ½ to 3 cups powdered sugar
2 tbls honey (I used a pepper honey, which I picked up from The Bee Folks)
2 tsp cinnamon
1 tsp chili powder
Cocoa nibs for garnish


Cream the butter and powdered sugar together, ½ cup of sugar at a time. When you reach the desired consistency, add cinnamon and chili powder. Frost cupcakes when cool and sprinkle with cocoa nibs.

The honey made the frosting extremely sweet, which was a good match for the less sweet cupcakes. The cupcakes themselves were dark and chocolately with a hint of the beer flavor. Had I used a darker beer (like the guiness or stout the recipe is typically used with), I might have been able to taste the beer a bit more. The spice in the frosting is subtle, but the honey and chili went well together, as the honey I used already had notes of spice in it. The cocoa nibs on top tied it all together with their dark chocolate, totally unsweet crunch.


Monday, February 20, 2012

I have a dream...

My cupcakes can only hope to be this adorable.
Image taken from Cakewrecks, made by Zoey Cakes of Baldwinsville, NY.
I have a dream. It’s true.

My dream is to make delicious baked goods. All the time.

It’s a simple dream, but it’s something I love to do.

Right now, I want to make cupcakes. So why don’t I go to the kitchen and make some god damn cupcakes right this second? Because these things take time. I don’t just buy a box of cake mix at my local box store and make that. No, I CREATE baked goods from scratch with exciting flavors and a little bit of experimentation. The kind of things I like to make take time. They take exploration of flavors and trips to specialty cooking stores. They take finding the right ingredients and ways to combine them into something awesome.

They also take actually having cupcake tins(ie. a muffin pan) in your possession....which I currently don’t have. With a quick trip to the store though, that will be remedied and I will be ready to make my next creation, involving THIS. I am so excited.